Have you ever wondered how to keep food cold without power? Whether due to an emergency or an off-grid lifestyle, the Zeer Pot offers an innovative solution. This non-electrical cooling method helps preserve food longer without modern refrigeration. Let’s dive into how it works and how you can create your own!
The Zeer Pot: An Ancient Cooling Solution
The Zeer Pot was developed in Africa and the Middle East to keep fruits and vegetables fresh for longer. Utilizing evaporative cooling, this method works best in shaded areas with cool, dry air and a consistent breeze. If conditions are ideal, a Zeer Pot can chill contents to around 40°F (4°C).
For those living off the grid, adding solar-powered fans can improve air circulation around the pot. However, high humidity (above 70%) can significantly reduce its cooling efficiency. Below is a chart showing the Zeer Pot’s cooling potential based on temperature and humidity levels:
What You'll Need to Build a Zeer Pot
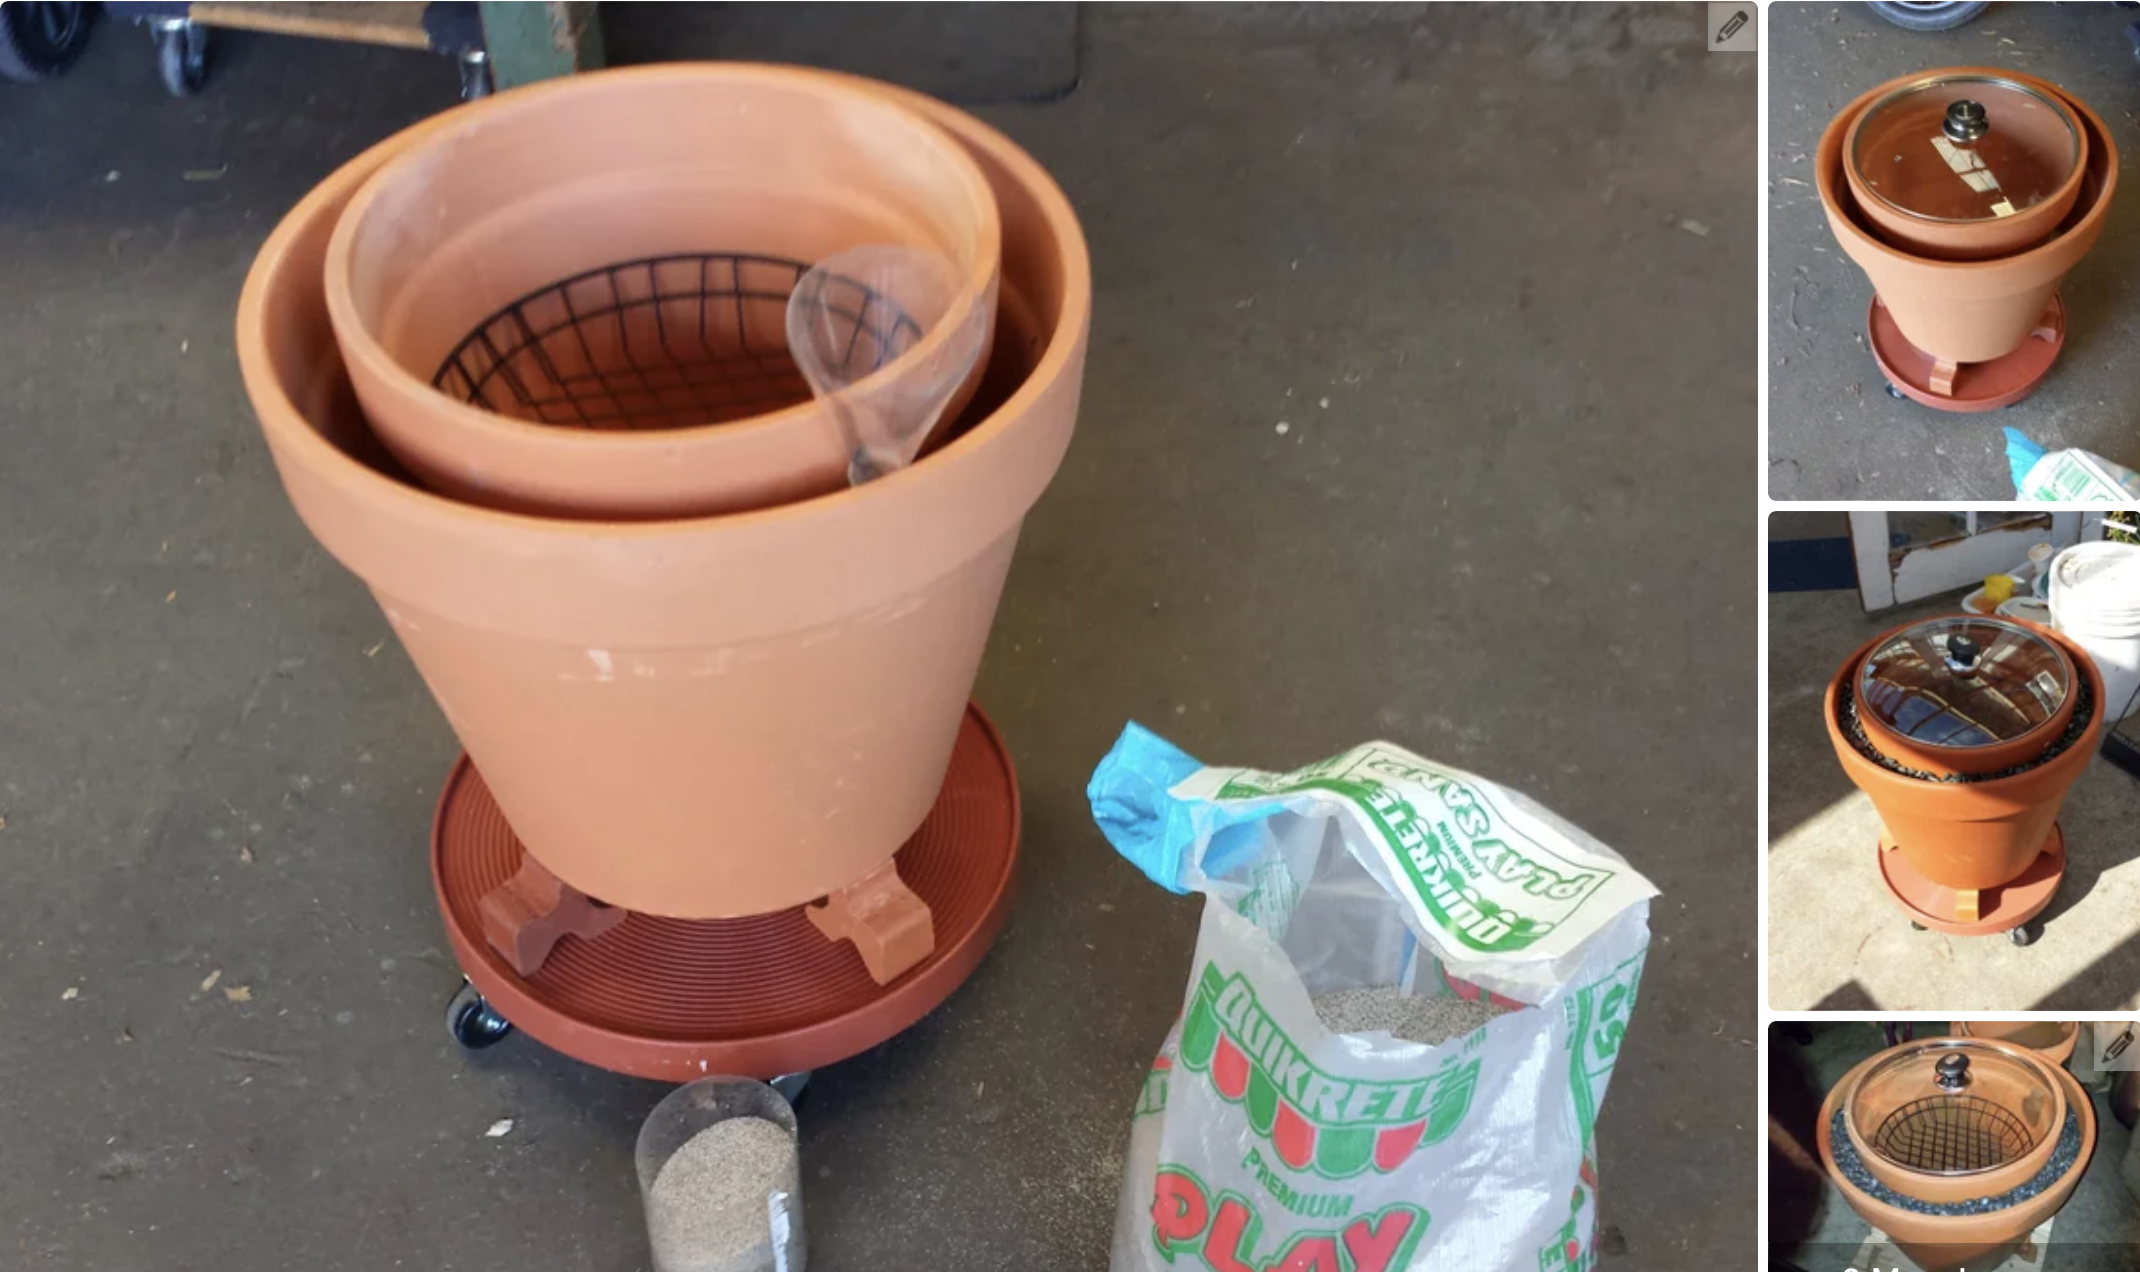
Here’s a list of materials for creating a basic Zeer Pot refrigerator:
- 18" unglazed terra cotta pot (allows moisture to evaporate easily)
- 14" terra cotta pot
- 50 lbs of pre-washed sand
- Gorilla Brand duct tape
- Funnel
- Refrigerator thermometer
- 13.5" glass pot lid
- 12" sandwich basket
Quick Step-by-Step Guide to Building a Zeer Pot
- Tape the drainage holes at the bottom of both pots to prevent sand from escaping.
- Fill the bottom of the larger pot with sand and level it to hold the smaller pot steady.
- Place the smaller pot inside the larger one, ensuring it is centered.
- Using a funnel, pack sand tightly around the smaller pot, filling the gap between the pots.
- Slowly add water to the sand until it is fully saturated. Avoid shifting the smaller pot.
- Check the glass lid for a snug fit and sand down the edges if needed.
- Place a damp cloth over the lid, and set the Zeer Pot in a shaded, well-ventilated area.
- Use a refrigerator thermometer to monitor the temperature before adding food or drinks.
Tip: The sand needs to stay damp for optimal cooling. Water it twice daily, and remember that the water doesn't need to be purified, making this method perfect for outdoor use!


