


A batch-type solar-powered water heater uses a thermosiphon loop to transfer water between a solar thermal collector and a storage barrel. While this design isn't the most efficient, it effectively demonstrates the thermosiphon process and provides hot water for outdoor showers, garden tasks, or other uses. Note: The system should be drained in cold weather to prevent damage.
Materials Needed
- Four 8-foot 2x4s
- Five 8-foot 1x4s
- 2 1/2" deck screws
- Two corrugated metal roofing panels (2 x 8 feet)
- High-temperature, flat black spray paint
- 100-foot black EPDM rubber garden hose (rated for 200°F)
- 55-gallon black plastic barrel with a wide-mouth top
- Additional fittings and connectors (refer to detailed instructions)
Steps to Build Your Solar Water Heater
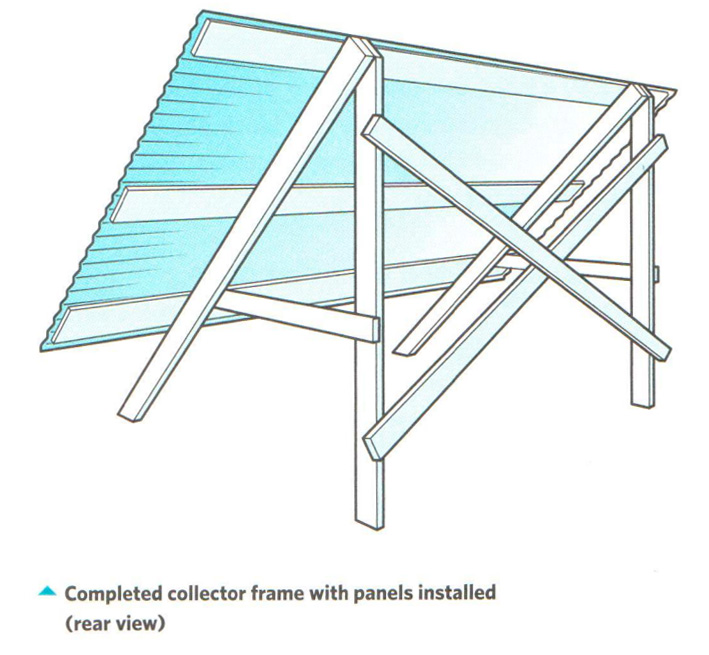
1. Build the Collector Structure
Construct two A-frame supports from 2x4s, ensuring the front legs are angled for optimal sunlight. Attach horizontal crosspieces and mount the corrugated roofing panels. Paint the panels black to enhance heat absorption.
2. Install the Collector Hose
Lay out the hose in a back-and-forth pattern across the collector panel. Secure with cable ties and ensure there are no kinks to prevent air bubbles. The hose should maintain contact with the panel for efficient heat transfer.
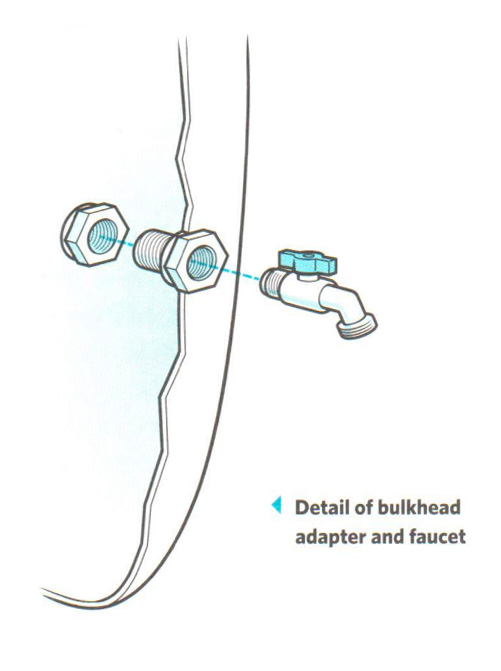
3. Prepare the Water Storage Barrel
Install bulkhead fittings on the barrel for water connections. Ensure proper sealing with Teflon tape and position the barrel higher than the collector for effective thermosiphon action.
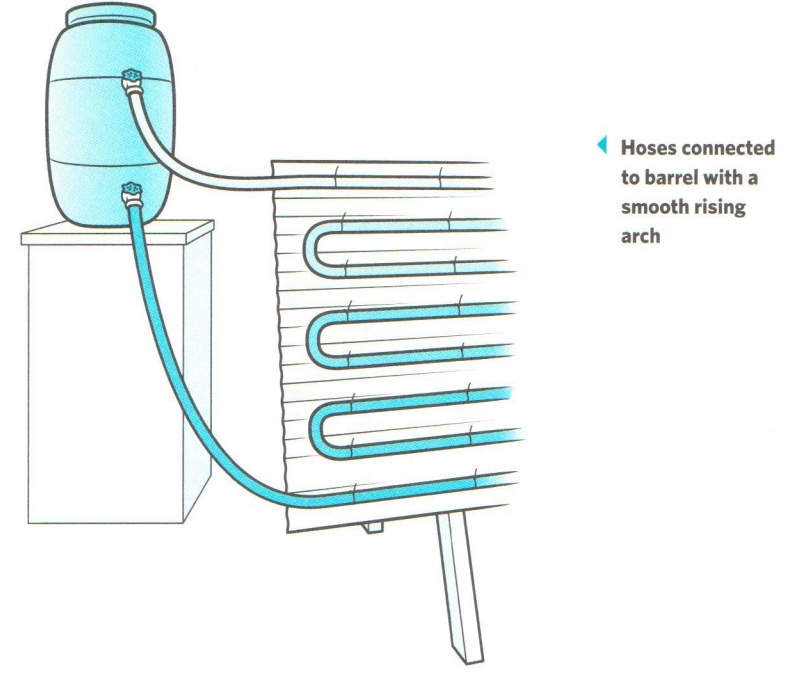
4. Set Up and Connect
Position the barrel and collector. Attach the hoses to the barrel fittings, ensuring smooth water flow. Insulate the hot water hose to minimize heat loss.
Performance and Upgrades
On a sunny day, this system can achieve a significant temperature rise in the water. For enhanced efficiency, consider insulating the barrel, enclosing the collector, or switching to an active system with a solar-powered pump.
Conclusion
Building a solar-powered water heater is a great DIY project for those interested in renewable energy. With careful setup and the right materials, you can harness the power of the sun to meet various water heating needs.
For more details and ideas, check out related water storage solutions and other preparedness tips.