Skip to content
FREE 72 Hour Food Kit On All Orders over $250 Use Coupon Code "FREE72" At Checkout

Call Now: 1-800-773-5331

Search Close
Wish Lists Cart
0 items

How to Make Your Own Arrowhead

18 Nov, 2014 173
How to Make Your Own Arrowhead
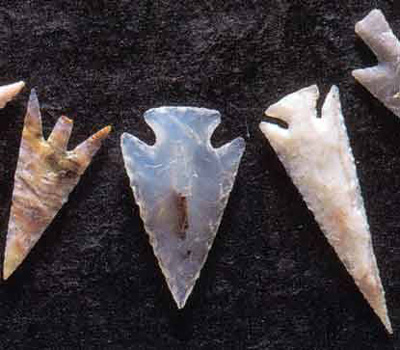
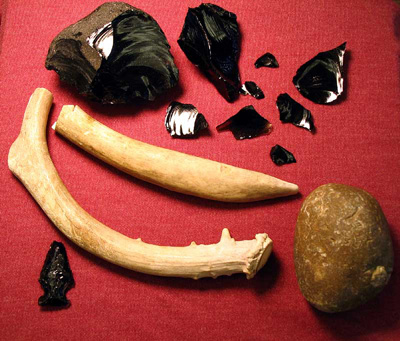
Learning how to make your own arrowheads is an important survival skill that helped our ancestors hunt game for thousands of years, and one that can keep you alive if you ever find yourself in a survival situation. The process of making arrowheads is called Flint Knapping, and it relies on making arrowheads from stone. The advantage of knowing this technique is that it allows you to make arrowheads from supplies that are plentiful in the wilderness, does not require a knife or fire, and gives you an arrowhead that you can reuse almost indefinitely. Make Your Own Arrowhead The process of flint knapping involves three basic steps: • Breaking open the source rock, called the core • Striking flakes of rock off of the core • Shaping the flakes into arrowheads The Source Rock Locating the right kind of source rock may prove to be the most difficult step, depending on the terrain you are in. You’ll need a fairly brittle rock that has a fine grain, a fairly uniform texture, and no seams or fractures. Flint, chert rock, chalcedony, and quartzite are all good source rocks. If you either don’t know how to identify any of these, or are having trouble finding them, you can test found rocks to find out whether they will be suitable for making arrowheads. You’ll want a fairly large rock for your source – this will increase your chances of breaking off a good piece for shaping. You should be able to hold it firmly with one hand against your leg or a supporting structure like a tree or boulder. Tap the source rock with another, harder rock and listen to the sound it makes. Rocks that ring with higher pitches are generally the best for source rocks. Strike the source rock hard with the other rock to see if fragments flake off. If they do, it should work for shaping arrowheads. You can also use glass, porcelain or the base of a beer bottle to make an arrowhead when no source rocks are available. If you are working with any of these materials, skip ahead to the instructions on shaping the arrowhead. The Hammer Stone This is the tool you will use to break flakes off of the source rock. It should be round, fairly easy to grip in one hand, and made of harder material than the source rock. A billet is a specialized tool designed for making arrowheads. It is cylindrical and usually made from hard wood or antlers. The Striking Surface Also called a platform, the striking surface is the part of the source rock that is close to an edge and has an angle less than 90 degrees. This is the part of the source rock that you will be hammering flakes off of. If your source rock has only rounded edges, you’ll have to break it apart to create edges with acute angles. Breaking off flakes The flakes are the pieces of the rock that will eventually be your arrowheads. There are two ways you can remove them from the source rock. Sit with your legs spread apart and the source rock gripped against one thigh, or crouch next to a tree with the source rock gripped against its base. Hammer the striking surface with controlled, glancing blows hard enough to break off big pieces. Once you have about a dozen good flakes, you’re ready to start shaping your arrowheads. Shaping the arrowheads The best method for shaping arrowheads (stone or glass) is with a pressure flaking tool, such as an antler, to load pressure onto one edge of the flake and then pop pieces of the flake off in a controlled manner. You can make a pressure flaking tool by fastening a copper nail to a hard piece of wood. Push the pressure flaking tool against a point that is below the center line of the flake with enough force to pop off a small piece of the arrowhead. Turn the arrowhead over and create a roughly symmetrical flake on the other side, where the “flake scar” from the first flake was formed is. Repeat, moving around the edge of the arrowhead, carefully shaping it into a triangular point. Notching The last step in making an arrowhead is notching it. Notches are formed on either side of the base of the arrowhead so that it can be tied to a shaft. Form notches by pressure flaking and abrading the base of the arrowhead to carve gaps.

Thanks for subscribing!

This email has been registered!

Shop the look

Choose Options

Back In Stock Notification
this is just a warning