Keeping your food storage organized is essential for effective use, especially if you frequently rotate your stock. A FIFO (First In, First Out) shelf system ensures easy tracking while saving space. Instead of purchasing expensive commercial options, follow this guide to create your own cost-effective rotation shelves.
Materials Needed
- Plywood:
- 2 pieces (24" x 68")
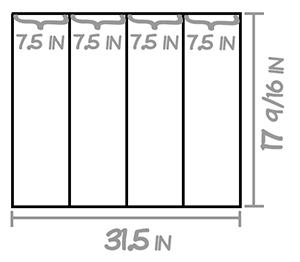
- 3 pieces (31.5" x 17 9/16")
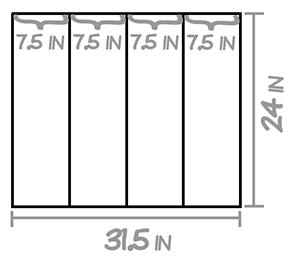
- 3 pieces (31.5" x 24")
- 2 pieces (24" x 32.5")
- 3 pieces (32.5" x 2")
- 15 strips (17 9/16" x ½")
- 15 strips (24" x ½")
- Circular saw
- Wood screws or heavy-duty glue
- Paint (optional)
Step-by-Step Instructions
Step 1: Understand the Dimensions
This design is optimized for #10 food storage cans, which measure 7 inches tall. Adjust dimensions if you plan to store smaller cans.
Step 2: Mark the Side Panels
Lay one 24" x 68" plywood piece flat. On one side, mark intervals of 6.5 inches, alternating with 10.5 inches, from top to bottom. On the opposite side, start 8.5 inches down, then alternate with 6.5-inch and 2-inch intervals.
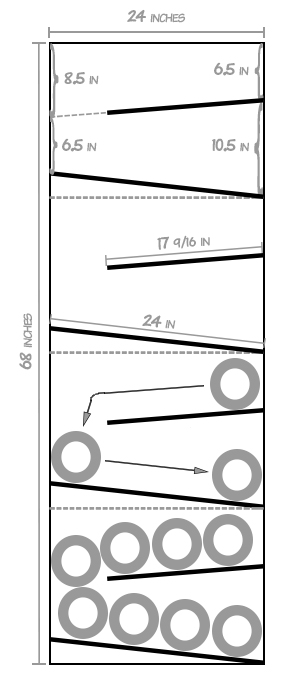
Step 3: Add Strip Guides
Attach ½-inch strips of wood along the marked lines. Alternate between 17 9/16" and 24" strips, ensuring proper alignment.
Step 4: Mirror and Assemble
Repeat Step 2 and Step 3 for the second 24" x 68" plywood, mirroring the measurements. Secure the two pieces together using the 24" x 32.5" top and base boards.
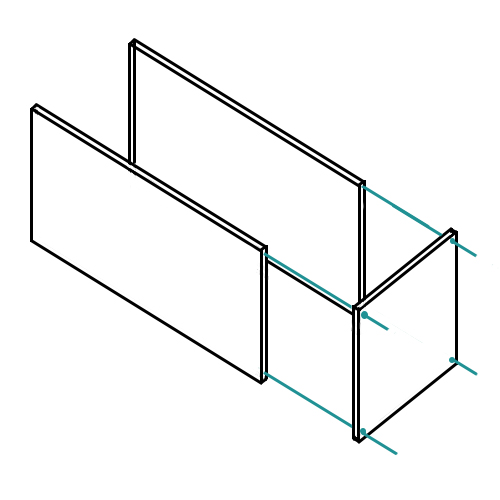
Step 5: Create Shelf Boards
Prepare the shelf boards:
- 17 9/16" x 31.5" boards: Attach ½-inch strips every 7.5 inches across.
- 24" x 31.5" boards: Similarly, attach ½-inch strips at 7.5-inch intervals.
 |
 |
Step 6: Install Shelves
Insert the prepared shelves into the frame, ensuring the boards rest securely on the strips. Drill or glue them into place if needed.
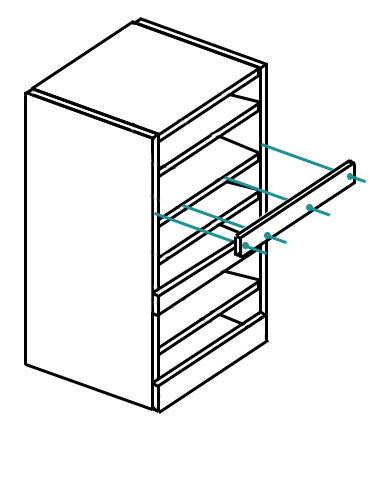
Step 7: Add Stopper Lips
Attach the 32.5" x 2" strips to the front of the second, fourth, and sixth levels to prevent cans from rolling off.
Step 8: Customize and Paint
Paint and decorate the shelving unit to fit your style. Enjoy your new organized food storage system!
Share Your Thoughts
How do you approach food storage? Did this tutorial help you build your FIFO shelves? Share your experience in the comments below!


