Earthquakes and other disasters can disrupt electricity, water, and plumbing systems. So, what do you do when nature calls, but your plumbing is out of order? Here’s how to prepare for emergency bathroom needs and properly manage waste disposal.
The History of Plumbing
The United States has one of the most advanced and expansive plumbing systems in the world. Indoor plumbing became common in the mid-1800s as discoveries of viruses and microorganisms emphasized the importance of proper sanitation.
Before plumbing, waste often contaminated water supplies, leading to widespread disease. Modern plumbing ensures waste is “flushed and forgotten,” but in emergencies, you need alternatives.
What You’ll Need for a Portable Potty Kit
With a few simple items, you can create an emergency portable toilet:
- Portable potty chemicals
- Portable potty lid
- 6-gallon bucket
- Portable potty bags
- Toilet paper
- Hand sanitizer
- Latex gloves
- Ventilation mask
Store all these items inside the 6-gallon bucket for easy access. To set up, place the potty bag over the rim of the bucket and secure the lid on top for stability.
Disposing of Waste
If plumbing remains unavailable for an extended period, you’ll need to decide where to dispose of your waste. If regular garbage collection is delayed, burying waste may be your best option. Here’s how to do it properly:
Creating a Cathole
Location
- Choose a spot at least 200 feet away from water sources, trails, and areas where people gather.
- Look for rich, organic soil—forested areas work best.
- Pick a south-facing slope or ridge top for maximum sunlight and heat, which aid decomposition.
- Ensure the location is slightly elevated to prevent storm runoff from contaminating water sources.
Digging
Use a small garden trowel to dig a hole that is:
- 6–8 inches deep
- 4–6 inches in diameter
Burying
After using the cathole:
- Cover the waste with the original dirt.
- Disguise the area with native materials like leaves or small branches.
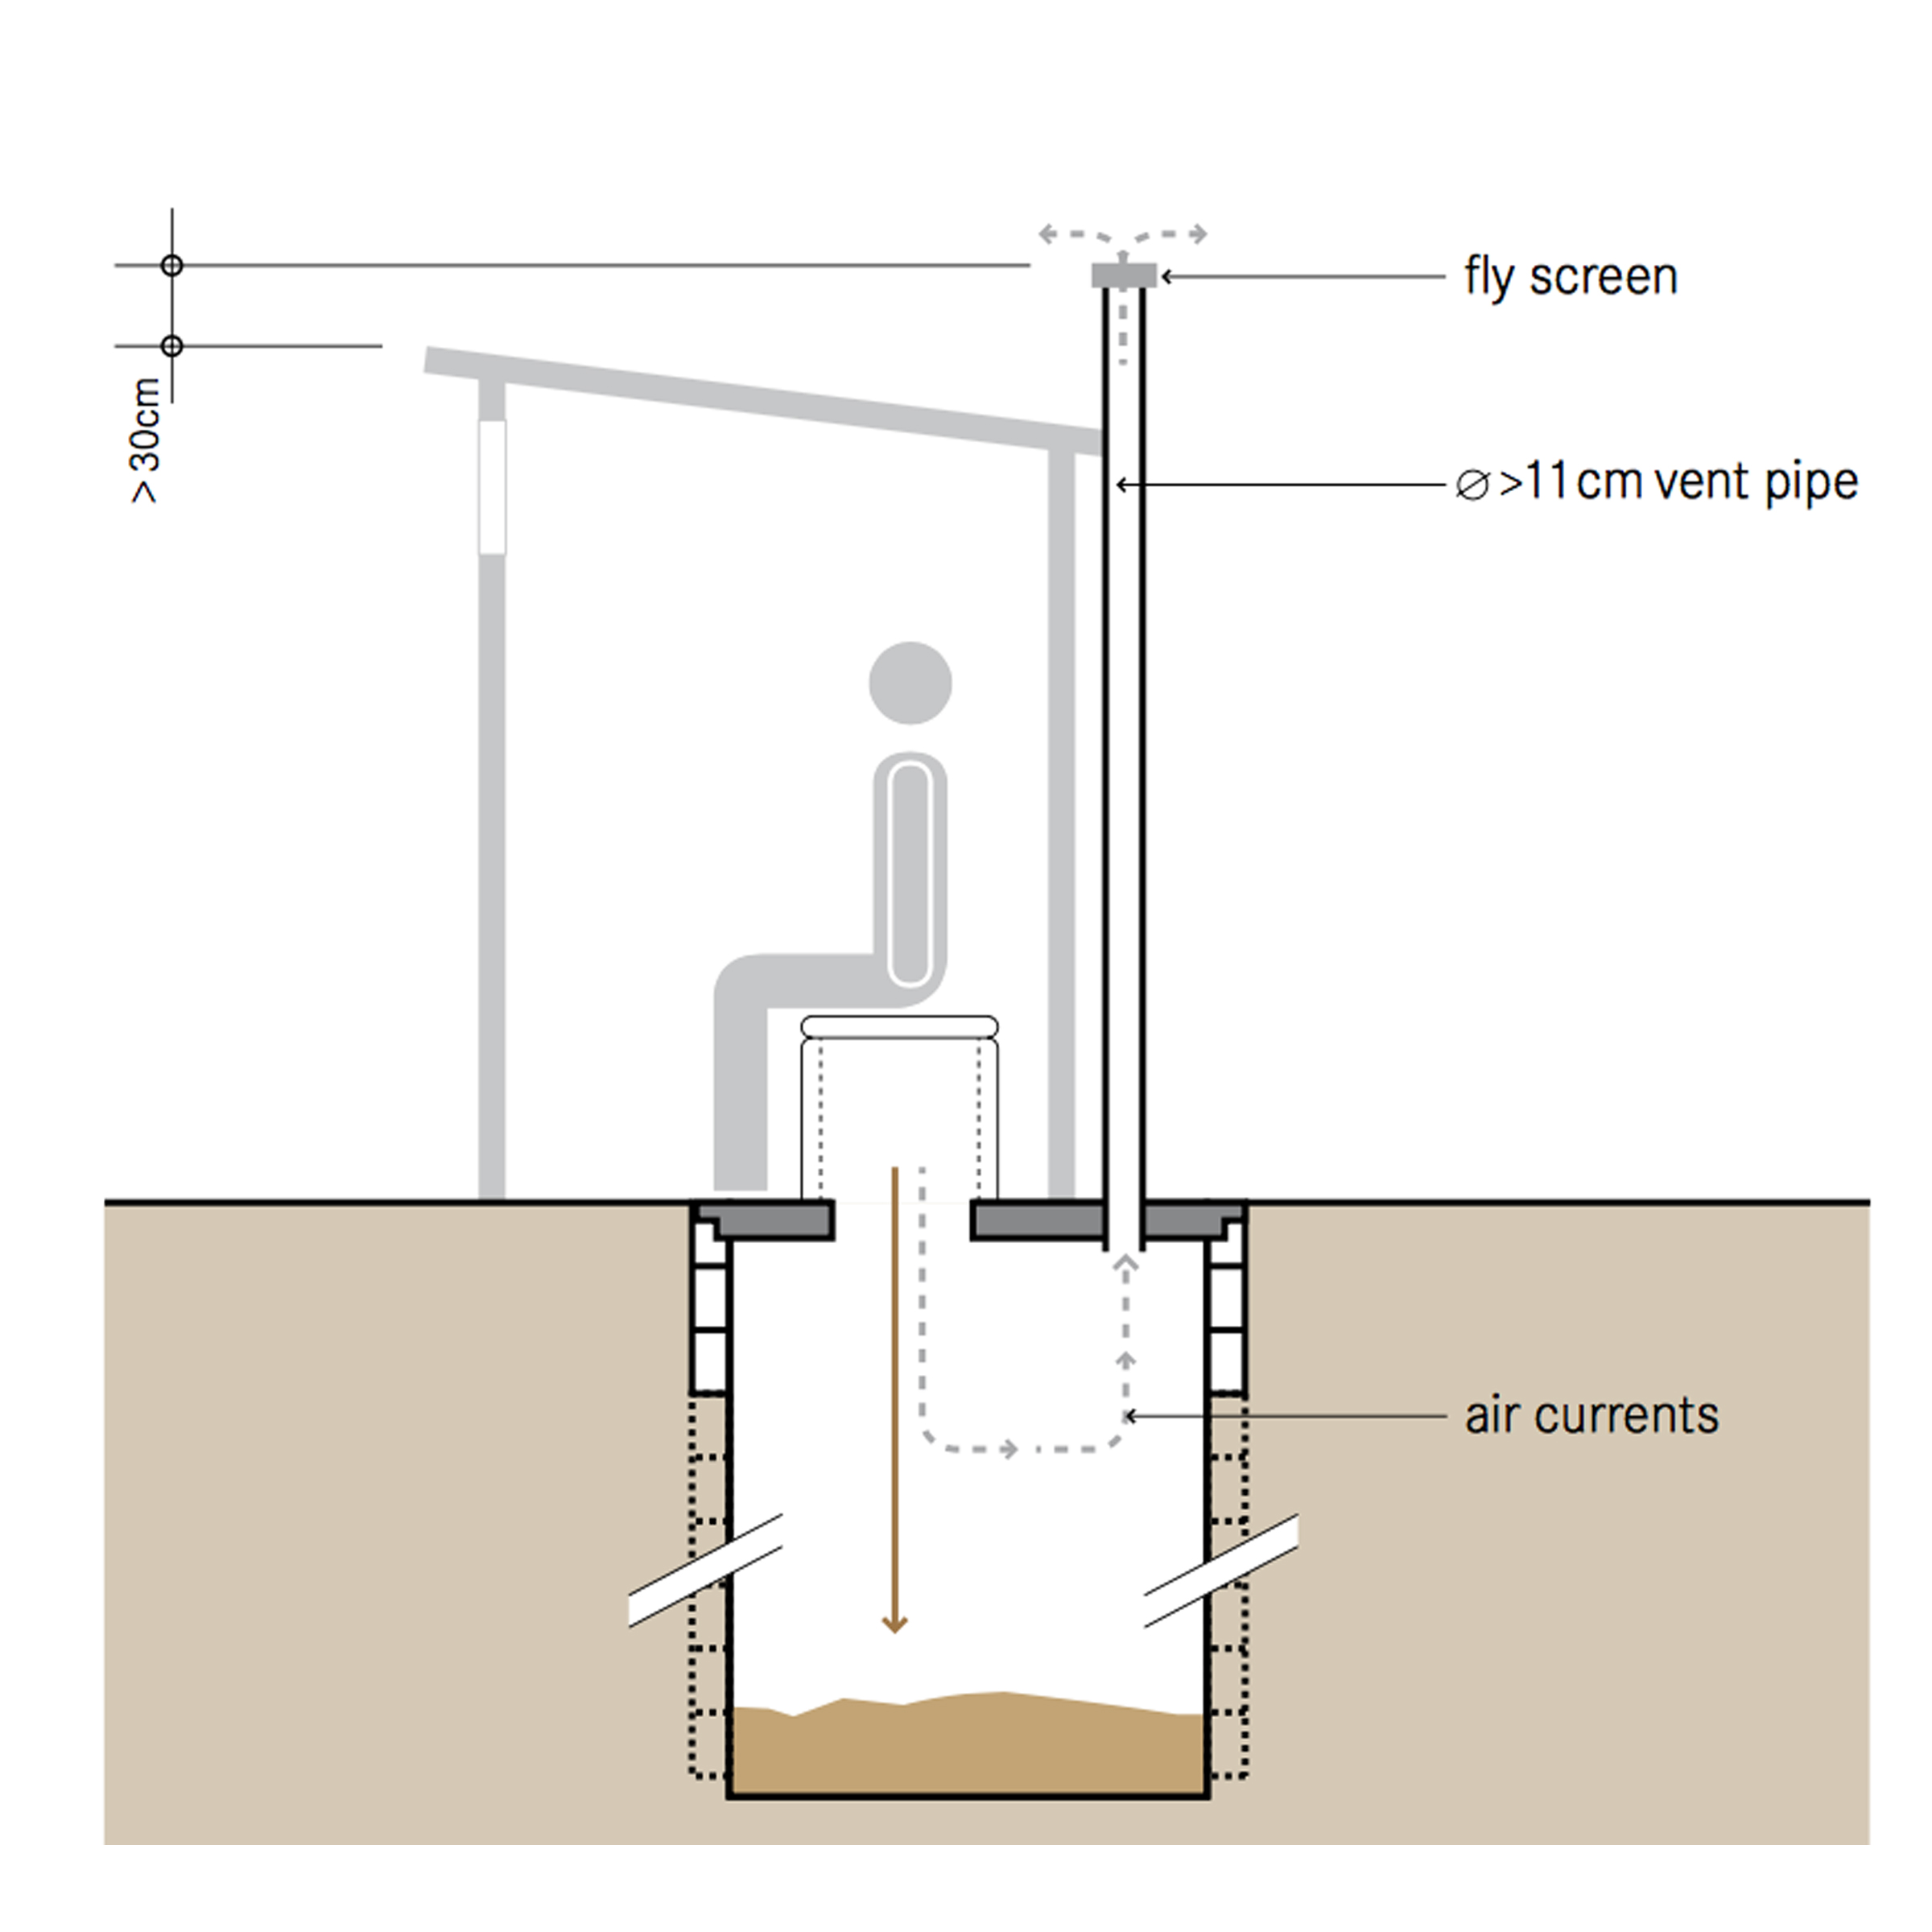
Building a Latrine for Extended Waste Management
For long-term situations or families with young children, a latrine may be more practical than multiple catholes.
Location
Follow the same criteria for a cathole: at least 200 feet from water sources and in elevated, sunny locations with organic-rich soil.
Digging
Use a shovel to dig a pit that is:
- At least 4 feet deep
- 3.5 feet wide
Burying
To aid decomposition:
- Throw a handful of dirt into the pit after each use.
- Cover the pit with dirt once it’s full.
Adding Shelter
If needed, build a small structure around the latrine for privacy and weather protection. Simple walls and a roof can make it more comfortable to use.
Other Things to Consider
Toilet Paper
If you use toilet paper, opt for plain, unbleached, and non-perfumed types, which are easier on the environment and decompose faster.
Camping and Peeing
For a visual guide, watch this helpful video demonstrating how to dig a cathole and manage waste effectively while camping:


